Phalaenopsis orchids, commonly known as moth orchids, are among the most popular orchids cultivated around the world. They are prized for their stunning, long-lasting blooms and ease of care, making them a favorite choice for both novice and experienced gardeners. This comprehensive how to care for phalaenopsis orchids, covering aspects such as light, watering, humidity, temperature, soil, fertilization, repotting, pest management, and troubleshooting common issues.
Understanding phalaenopsis orchids
Here are the details:
Basic characteristics
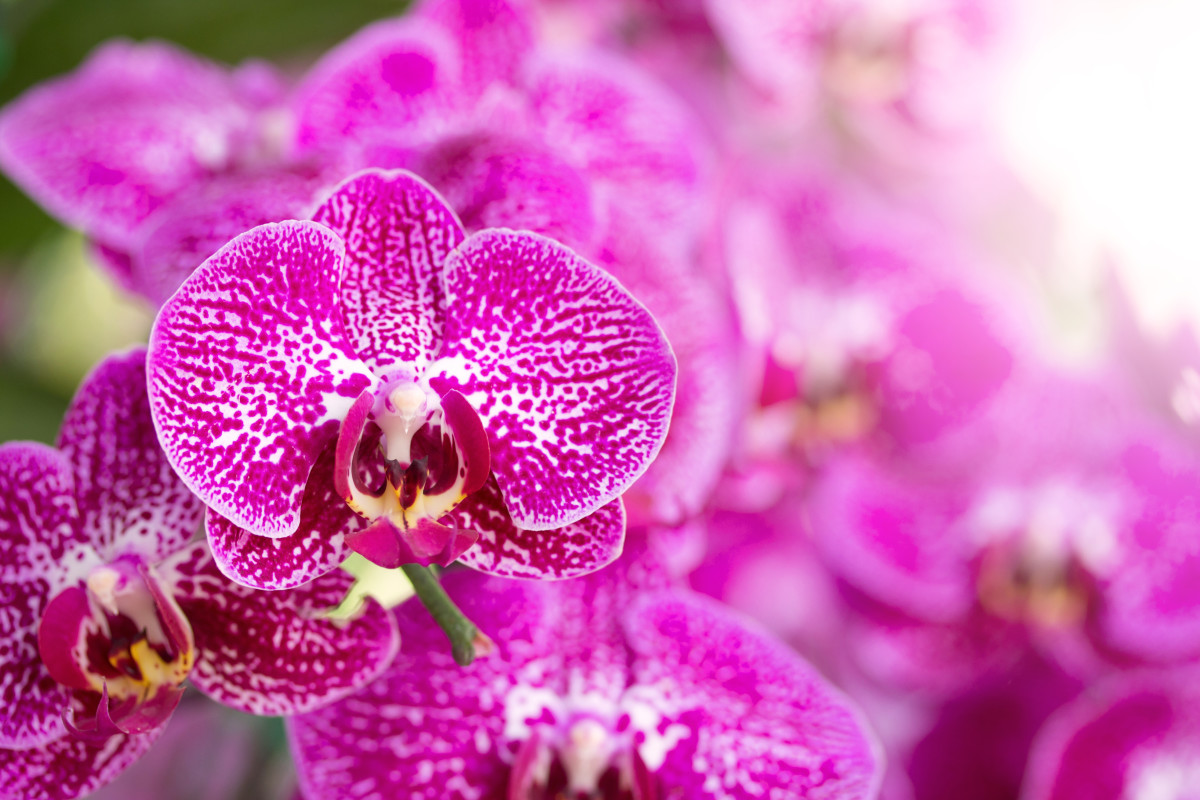
Phalaenopsis orchids are native to Southeast Asia and are known for their distinctive, broad, flat leaves and long flower spikes that can produce multiple blooms. The flowers come in a wide variety of colors, including white, pink, yellow, and purple, often with unique patterns and spots. Each flower can last for several months, creating a beautiful display that can brighten any indoor space.
Lifespan and growth habits
Phalaenopsis orchids are classified as epiphytic plants, meaning they grow naturally on trees and absorb moisture and nutrients from the air and rain. They typically bloom once or twice a year, with flowering periods varying depending on the specific care they receive. Under optimal conditions, Phalaenopsis orchids can live for many years and continue to produce blooms.
How to care for phalaenopsis orchids – Importance of proper care
While Phalaenopsis orchids are relatively forgiving, providing them with the right care will ensure they remain healthy and continue to bloom year after year. Understanding their needs in terms of light, water, and nutrients is essential for success.
Choosing the right location
Here are the details:
Light requirements
- Bright, indirect light: Phalaenopsis orchids thrive in bright, indirect light. They prefer environments that mimic their natural habitats, which have filtered sunlight. An east-facing window is ideal, as it provides gentle morning sunlight. If you have south or west-facing windows, be sure to filter the light with sheer curtains to prevent direct sun exposure, which can scorch the leaves.
- Signs of insufficient light: If your orchid is not receiving enough light, you may notice that the leaves become dark green and the plant stretches toward the light source. Additionally, fewer flowers may develop, and the overall growth may be sluggish.
- Adjusting light conditions: If you suspect your orchid is not getting enough light, gradually move it to a brighter location over a few days to prevent shock. Monitor the plant’s response and adjust as necessary.
Temperature preferences
- Optimal temperature range: Phalaenopsis orchids prefer temperatures between 65°f to 80°f (18°c to 27°c) during the day and slightly cooler temperatures at night, ideally around 60°F to 70°F (15°C to 21°C). These temperature ranges mimic the warm, humid conditions of their native tropical habitats.
- Avoid temperature extremes: Keep your orchids away from cold drafts, air conditioning vents, and direct heat sources like radiators. Sudden temperature changes can stress the plant and negatively impact blooming.
- Seasonal adjustments: Be mindful of seasonal changes in temperature. In winter, it may be necessary to move your orchid away from windows to prevent exposure to cold drafts.
Watering phalaenopsis orchids
Proper watering is one of the most critical aspects of orchid care.
Watering frequency
- Checking soil moisture: Water your Phalaenopsis orchid when the top inch of the potting medium feels dry to the touch. This usually means watering every 1 to 2 weeks, but the frequency can vary based on environmental factors such as humidity and temperature.
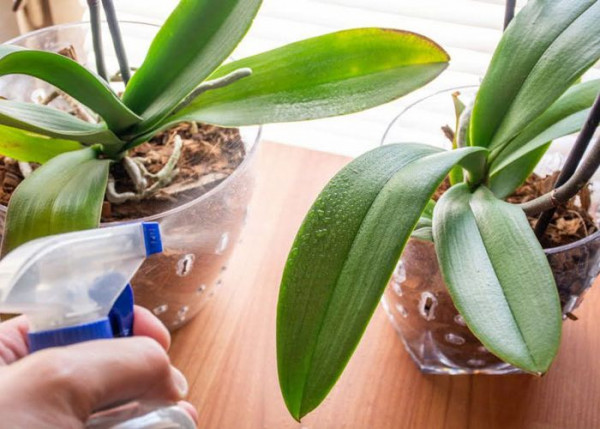
- Watering method: When watering, use room temperature water and water thoroughly until it drains out of the bottom of the pot. This ensures that the roots receive adequate moisture. It’s best to water in the morning, allowing the leaves to dry during the day to prevent rot.
- Signs of overwatering: Yellowing leaves and mushy roots are common signs of overwatering. If you suspect root rot, gently remove the plant from its pot to inspect the roots. Healthy roots should be firm and green or white, while rotting roots will appear brown and mushy.
Signs of underwatering
- Recognizing underwatering: If the leaves appear wrinkled, shriveled, or limp, your orchid may not be receiving enough water. Underwatered plants may also show signs of stunted growth.
- Adjusting watering routine: If you notice signs of underwatering, adjust your watering schedule to ensure the plant receives adequate moisture. Gradually increase watering frequency, monitoring the plant’s response.
Humidity and air circulation
Phalaenopsis orchids thrive in high humidity environments.
Humidity requirements
- Ideal humidity levels: Aim for humidity levels between 50% to 70% for optimal growth. Higher humidity levels can help prevent leaf curling and promote healthy blooms.
- Increasing humidity: If the air in your home is dry, especially in winter, consider using a humidifier to maintain adequate humidity levels. Alternatively, you can place a tray of water with pebbles under the pot to create humidity without overwatering the plant.
- Misting considerations: While misting can temporarily increase humidity, avoid letting water sit on the leaves, as this can lead to fungal infections. Instead, focus on maintaining a consistently humid environment.
Air circulation
- Importance of good airflow: Adequate air circulation is crucial for preventing mold and pest issues. Ensure that your orchids are not overcrowded, as this can inhibit airflow and increase humidity levels around the plants.
- Using fans: Consider using a small fan in the room where your orchids are located to improve air circulation without blowing directly on the plants. This helps keep the leaves dry and reduces the risk of diseases.
Choosing the right potting medium
Phalaenopsis orchids require a special potting medium that mimics their natural growing conditions.
Potting mix
- Orchid potting mix: Use a high-quality orchid potting mix that contains materials like fir bark, sphagnum moss, perlite, and coconut coir. These components provide excellent drainage and airflow to the roots, which is essential for healthy growth.
- Repotting frequency: Repot your Phalaenopsis orchid every 1 to 2 years, typically after blooming has finished. This refreshes the potting medium and allows the roots to have more room for growth.
- Signs of medium breakdown: If the potting medium breaks down and becomes compacted, it can restrict airflow to the roots and retain excess moisture, leading to root rot. If you notice a strong odor or mushy texture, it’s time to repot.
Pot selection
- Pot with drainage holes: Ensure that your pot has adequate drainage holes to allow excess water to escape. This prevents water from pooling at the bottom and helps prevent root rot.
- Clear pots: Many orchid enthusiasts prefer clear plastic pots, which allow you to monitor the health of the roots and the moisture level in the potting medium easily. If using a non-transparent pot, make sure to check for drainage regularly.
Fertilization
Providing the right nutrients is essential for healthy growth and blooming.
Fertilization schedule
- When to fertilize: Begin fertilizing your Phalaenopsis orchid when new growth appears in spring and continue until late summer. This is the active growing season when the plant can benefit from additional nutrients.
- Choosing fertilizer: Use a balanced orchid fertilizer, typically with a formula like 30-10-10 or 20-20-20, diluted to half the recommended strength. This prevents over-fertilization, which can damage the roots.
- Signs of nutrient deficiency: If you notice yellowing leaves or stunted growth, your orchid may be lacking essential nutrients. Adjust your fertilization routine accordingly.
Application method
- Watering before fertilizing: Water your orchid a day before applying fertilizer. This ensures the roots are moist and reduces the risk of fertilizer burn.
- Applying fertilizer: Apply the diluted fertilizer evenly to the potting mix and water thoroughly afterward to help distribute the nutrients. Avoid getting fertilizer on the leaves, as this can cause burning.
Pruning and deadheading
Pruning and deadheading are important for maintaining the health and appearance of your Phalaenopsis orchid.
Deadheading flowers
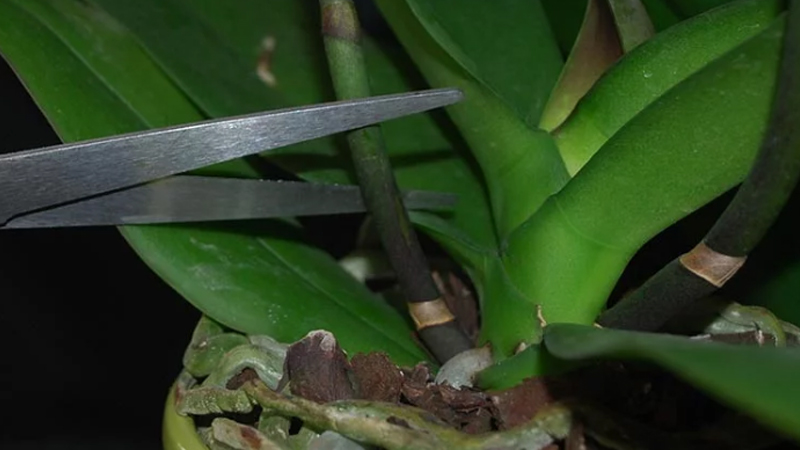
- Removing spent blooms: After the flowers have wilted and dropped, cut the flower spike back to the base of the plant. This encourages the orchid to focus its energy on new growth and promotes future blooming.
- When to prune: If the flower spike turns brown, cut it back to the base. If it remains green, you can leave it to potentially produce new blooms from the same spike.
Leaf care
- Cleaning leaves: Wipe the leaves with a damp cloth to remove dust and debris. This helps the plant photosynthesize more efficiently and prevents pest infestations.
- Removing damaged leaves: If any leaves turn yellow or show signs of damage, trim them off at the base using sterilized scissors. This not only improves the plant’s appearance but also reduces the risk of disease.
Pest management
Pests can pose a significant threat to the health of your Phalaenopsis orchid.
Common pests
- Aphids: Small, soft-bodied insects that can cluster on new growth. They can cause leaf distortion and weaken the plant. Use insecticidal soap or neem oil to control infestations.
- Mealybugs: These pests appear as white, cottony masses on the plant and can drain the plant’s juices. Remove them manually with a cotton swab dipped in alcohol or treat with insecticidal soap.
- Spider mites: These tiny pests can cause leaf discoloration and stippling. Increase humidity and use insecticidal soap to manage infestations.
Prevention
- Regular inspection: Check your orchids regularly for signs of pests. Early detection is key to preventing infestations from spreading.
- Maintain clean environment: Keep the area around your orchid clean and free from debris to reduce pest risks. Quarantine new plants before introducing them to your collection to avoid spreading pests.
- Beneficial insects: Consider introducing beneficial insects like ladybugs or predatory mites if you notice a recurring pest problem.
Common problems and solutions
Even with proper care, Phalaenopsis orchids can encounter several common issues. Here are some signs to look out for and their solutions:
Yellowing leaves
- Causes: Yellowing leaves can be a sign of overwatering, nutrient deficiencies, or insufficient light.
- Solutions: Check your watering schedule and adjust as necessary. Ensure your orchid is receiving adequate light, and consider fertilizing if nutrient deficiency is suspected. If the yellowing is due to overwatering, allow the plant to dry out more between waterings.
Dropping flowers
- Causes: Dropping flowers can result from environmental stress, such as sudden temperature changes, low humidity, or overwatering.
- Solutions: Maintain stable temperature and humidity levels, and ensure your orchid is not in a drafty location. Adjust your watering routine to keep the potting medium slightly moist, and avoid moving the plant too frequently.
Failure to bloom
- Causes: Lack of blooms can be due to insufficient light, improper watering, or the plant being too young or newly repotted.
- Solutions: Ensure your orchid receives adequate light and maintain proper watering. If the plant is newly repotted, give it time to adjust before expecting blooms. Fertilize regularly during the growing season to promote blooming.
Leaf curling
- Causes: Leaf curling can indicate environmental stress, such as low humidity or extreme temperatures.
- Solutions: Increase humidity levels around the plant and ensure it is in a stable temperature environment. Misting the leaves can help temporarily, but maintaining a consistent humidity level is key.
Repotting phalaenopsis orchids
Repotting is essential for the health of your orchid and should be done every 1-2 years.
When to repot
- After blooming: The best time to repot is after the blooming period, typically in late winter or early spring. This allows the plant to recover before the next growing season.
- Signs of repotting need: If you notice roots growing out of the pot, the potting medium breaking down, or signs of rot, it’s time to repot.
Repotting steps
- Prepare materials: Gather a clean pot, fresh orchid potting mix, and sterilized scissors or pruning shears.
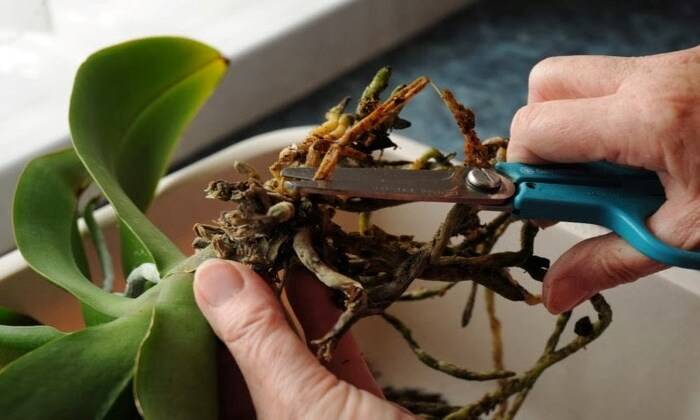
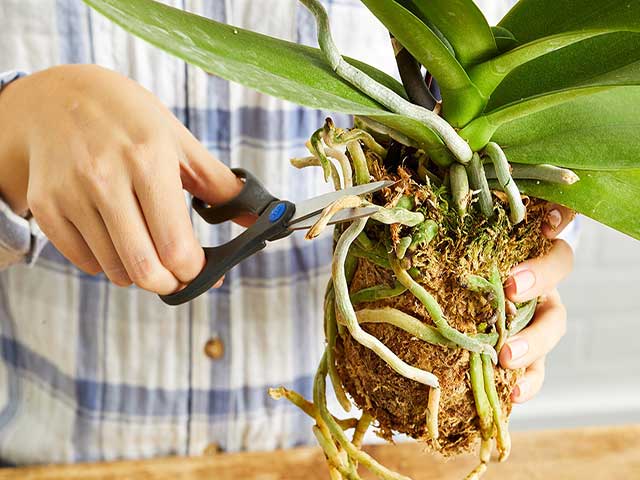
- Remove the orchid: Gently take the orchid out of its pot, taking care not to damage the roots. Remove any dead or rotten roots. Healthy roots should be firm and green or white, while rotting roots will appear brown and mushy.
- Place in new pot: Place the orchid in the new pot and fill it with fresh potting mix, ensuring that the base of the plant is at the same level it was in the previous pot.
- Water thoroughly: After repotting, water the orchid thoroughly and place it in a location with bright, indirect light. Allow the plant to adjust to its new environment for a few weeks before resuming regular care routines.
Conclusion
Above is “how to care for phalaenopsis orchids” caring for Phalaenopsis orchids can be a rewarding experience that allows you to enjoy their stunning beauty for years. By providing the right light, water, humidity, and nutrients, you can ensure your orchids thrive and produce beautiful blooms. Regular maintenance, such as pruning, deadheading, and pest management, will help keep your plants healthy and vibrant.

Related articles
Top 5 Spring Tree Pests: Identifying and Managing Common Threats
How to Grow Virginia Creeper: A Complete Guide
How to care for cyclamen from the expert
Detailed instructions: How to care for propagated plants
Understanding tree diseases: Identification, prevention, and treatment
Detailed instructions: How to care for fruit trees
Detailed instructions how to grow winter vegetables
How to propagate an aloe plant: a detailed guide to the methods